
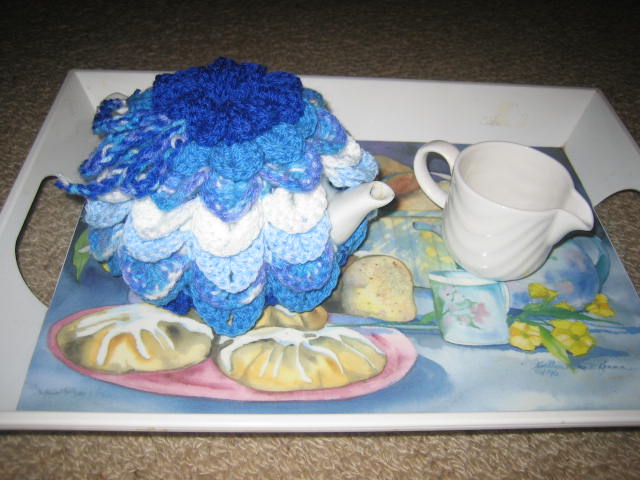
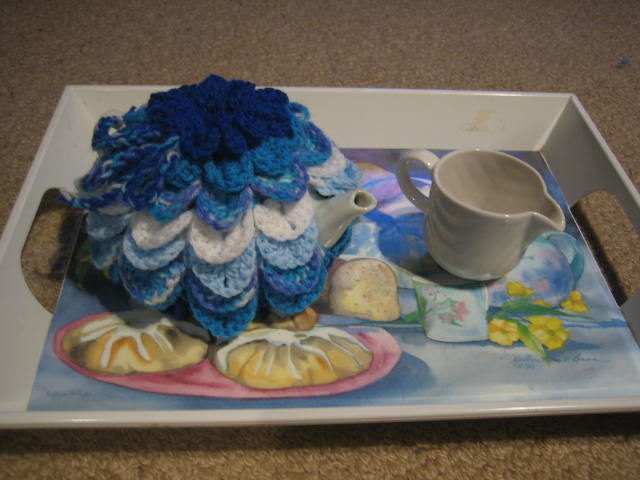
Scallop Tea Cosy
FREE PATTERN
(Australian, English Instructions)
USE THE CORRECT INSTRUCTIONS
(c) 2006. Pattern not to be reproduced. While I am happy for you to make these for personal use, gifts and charity fundraising, do not sell to make a personal profit. crochetroo Australia
Large Pot
8 ply yarn
Size 8 or 4mm hook
Leaving a thread of about 30cm, chain 39
Row 1
Miss 5ch make *(1tr, 1ch, 1tr) into next ch, 2ch, miss 2ch, 1dc into next chain, 2ch, miss 2ch. Repeat from 8 across row finishing in a dc. You should have 6 treble V groups. Turn.
Row 2
1ch, 1dc into last dc of previous row. *Working around treble of V below, work 6fptr, 1ch turn work so that the V is sideways, and the point facing right. Work up 2nd tr post of V work 6fptr; 1 dc into next dc. Repeat across from * You should have 6 scallops and finish on a dc in to the 3rd ch of the first 5ch of row 1. Turn. The trick is in the front post treble. You need to work down the first treble from top to bottom, then up the second one from bottom to top.
Row 3
1ch 1dc into first dc. Ch2, *(1 tr, 1ch, 1tr) into next 1ch space between V, 2ch, 1dc into next dc, 2ch, Repeat from * across row finishing in a dc.
(Note: I have been doing these for so long I find it hard to explain, but this bit seems to trick people up. There are basically 2 rows, the V row which is the base row, and the scallop row. As you work you will end up with a definate right and wrong side.
On the 3rd row you do a ch 1, 1dc in the last dc of the row below. This will give you a firm edge for when you join this up. Do 2 ch, and then into the space made between your scallops you do 1tr 1ch 1tr. This forms a V. If the scallop row wasnt there you would see that all the Vs are on top of each other. Then do 2 ch and 1dc into the dc between the scallops. The scallops will point down so you are actually looking at the back of the tr. It gets easier as you go along and the fabric takes shape.)
Row 4 as for row 2.
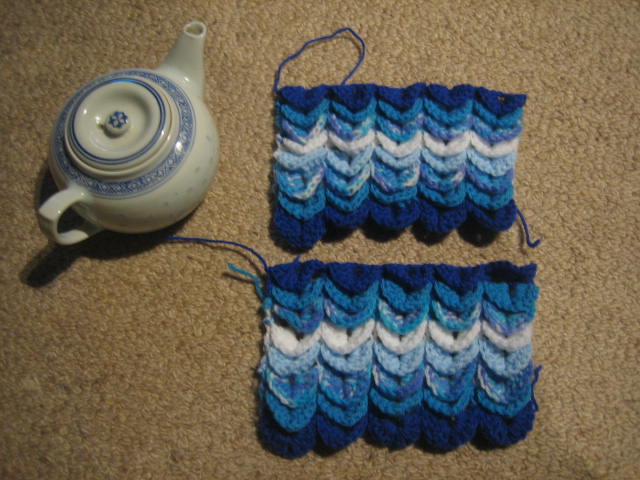
Work 12 rows scallops (24 rows). To achieve a striped effect do 2 rows of each colour.
Leave a thread of about 30 cm on last row.
Make 2 pieces the same.

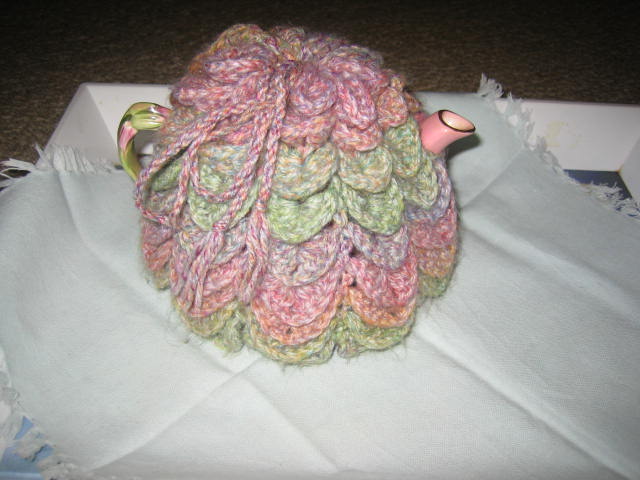
The back should look like this.

Using double thread, crochet approx 60 cm of chain. Thread this through the 2nd last row behind the V and in front of the dc. Pull tight and make a bow.
Put the kettle on, and make a nice pot of tea knowing it will stay warm for hours.
Chain 33, and work with 5 treble Vs
Work 8 rows scallops
If you are unsure of how many stitches I make a chain of 27, 33, 39, 45.
Each 6 chain will give you one scallop. I measure this against the thickest part of the pot.
Make as many scallops as required until you have the height of the pot.
If it is a very small pot, say less than 5 scallops, I do 5 treble in each post instead of 6.
Scallop Tea Cosy
(American Instructions)
(c) 2006. Pattern not to be reproduced. While I am happy for you to make these for personal use, gifts and charity fundraising, do not sell to make a personal profit. crochetroo Australia
 Size G (4mm) hook and worsted weight yarn.
Leaving a thread of about 12 inches, chain 39
Row 1
Miss 5ch make *(1dc, 1ch, 1dc) into next ch, 2ch, miss 2ch, 1sc into next chain, 2ch, miss 2ch. Repeat from 8 across row finishing in a sc. You should have 6 dc V groups. Turn.
Row 2
1ch, 1sc into last sc of previous row. *Working around dc of V below, work 6fpdc, 1ch turn work so that V is sideways and the point facing right. Work up 2nd dc post of V work 6fpdc then 1sc into next sc. Repeat across from *. You should have 6 scallops and finish on a sc in to the 3rd ch of the first 5ch of row 1. Turn.
The trick is in the front post double crochet. You need to work down the first dc from top to bottom, then up the second dc from bottom to top.
Row 3
1ch 1sc into first sc. Ch2, *(1dc, 1ch, 1dc) into next 1ch space between V, 2ch, 1sc into next sc, 2ch, Repeat from * across row finishing in a sc.
(note: This bit seems to trick people up. I have been doing these for so long I find it hard to explain, I am really sorry. There are basically 2 rows, the V row which is the base row, and the scallop row. As you work you will end up with a definate right and wrong side.
On the 3rd row you do a ch 1, 1sc in the sc of the row below. This will give you a firm edge for when you join this up. Do 2 ch, and then into the space made between your scallops you do 1dc 1ch 1dc. This forms a V. If the scallop row wasnt there you would see that all the Vs are on top of each other. Then do 2 ch and 1sc into the sc between the scallops. The scallops will point down so you are actually looking at the back of the dc. It gets easier as you go along and the fabric takes shape.)
Row 4 as for row 2.
Work 12 rows scallops (24 rows). To achieve a striped effect do 2 rows of each colour.
Leave a thread of about 12inches on last row.
Make 2 pieces the same. Using the starter thread, stitch sides together at bottom for 2 scallops catching dc only. Repeat at the top. You may need to stitch more depending on your pot size. You should have 1 hole at each side of the rectangle for the spout and handle.
Using double thread, crochet approx 24 inches of chain. Thread this through the 2nd last row behind the V and in front of the sc. Pull tight and make a bow.
Put the kettle on, and make a nice pot of tea knowing it will stay warm for hours.
Small Pot
Chain 33, and work with 5 double crochet Vs
Work 8 rows scallops
If you are unsure of how many stitches I make a chain of 27, 33, 39, 45.
Each 6 chain will give you one scallop. I measure this against the thickest part of the pot.
Make as many scallops as required until you have the height of the pot.
If it is a very small pot, say less than 5 scallops, I do 5 double crochet in each post instead of 6.


