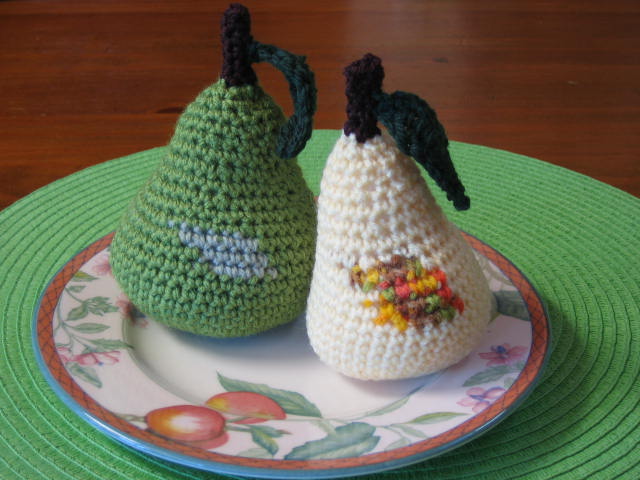
I just love to eat a juicy pear. At the moment bananas are a ridiculous price because of cylclone Larry, so pears have become a good alternative.
These ones are crochet. The green one is a packham pear, and the lemon one is a corella pear.
Pear juice is incredibly good for your insides. Apparantly it is a much more effective, and gentler remedy than prunes. A continence nurse once told me this, and who am I to argue?
Because I like pears so much I am posting the pattern. While pears aren't original, my patterns are, so remember this is copyright. If you do download the pattern, it would be nice to leave a message just so I can measure the popularity of the pear. Have Fun!
Australian Instructions
4mm or size 8 hook.
8 ply or worsted weight yarn
You need 4 colours: Brown for stalk and base, light green for body, lighter green or lemon for colour splotch. Leaf green
Large Pear
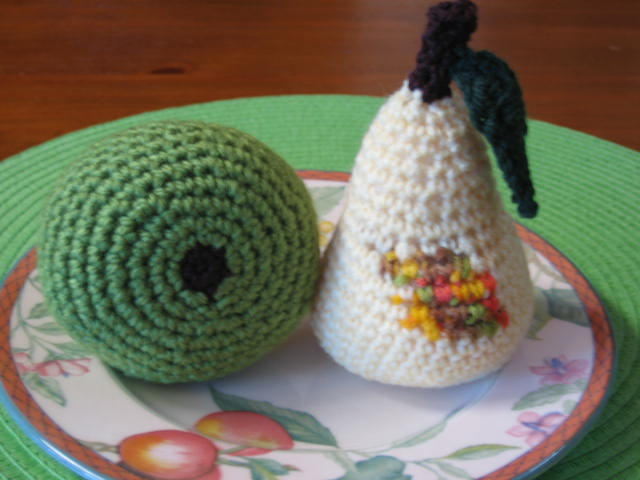
Starting with brown
1. 2ch, 6dc into 2nd ch from hook, slst into first ch
Change to green
2. 1ch, 2dc each stitch around slst first ch = 12
3. 1ch, (1dc next st, 2dc next st) around, slst first ch = 18
4. 1ch, (1dc next 2st, 2dc next st) around, slst first ch = 24
5. 1ch, (1dc next 3st, 2dc next st) around, slst first ch = 30
6. 1ch, (1dc next 4st, 2dc next st) around, slst first ch = 36
7. 1ch, (1dc next 5st, 2dc next st) around, slst first ch = 42
8 – 11. 1dc around on 42st, start each round with 1ch, and join with a slst
Make a colour splotch (optional if you prefer it plain)
12 – 14. 1ch, 1dc next 6, using a lighter green, 1dc next 5, working over main colour, then pick up main colour and continue round. Leave the second colour behind work. When doing the second round, gently bring lighter colour across back of work be careful not to pucker your pear.
15. 1ch, (1dc next 5st, 2dc together) around, slst first ch = 36
16. 1ch, 1dc around on 36st, join with a slst
17. 1ch, (1dc next 4st, 2dc together) around, slst first ch = 30
18. 1ch, 1dc around on 30st, join with a slst
19. 1ch, (1dc next 3st, 2dc together) around, slst first ch = 24
20. 1ch, 1dc around on 24st, join with a slst
21. 1ch, (1dc next 2st, 2dc together) around, slst first ch = 18 stuff pear
22. 1ch, 1dc around on 18st, join with a slst
23. 1ch, 1dc around on 18st, join with a slst
24. 1ch, (1dc next st, 2dc together) around, slst first ch = 12
25. 1ch, 2together around, slst and cut yarn. Add extra stuffing if needed
Make a stalk

26. Using brown, join to top of pear and work 6dc around. At this point it may be easier to work from the inside of your work in continuous rounds until the stalk measures 2 cm in length. Finish with a slip stitch and cut yarn. Insert your hook through the side of the pear, and up the middle of the stalk and pull the brown thread end through. This gives a neat finish.
Make a leaf
Using leafy colour make 10ch.
Starting in 2nd ch from hook, work back 1dc next 2ch, 1htr next 3ch, 1tr next 2ch, 1htr next ch, 1dc last ch.
Work 2dc into stalk about half way up. This will attach the leaf. Continue to work back along under side loops of ch: 1dc next 2ch, 1htr next ch, 2tr into next ch, 1htr next ch, 1dc next 3ch, 1slst and finish off. Weave thread end back through the leaf.
Smaller Pear
Work up to and including row 6.
7 -10 1ch, then 1dc around on 36 stitches.
11 – 13. Make a colour splotch as for larger pear, rows 12 -14. Once you master this you can add an extra few stitches in the next row.
14 – 19. as for rows 17 – 22 (omit row 23)
20. as for 24
21 – 22. 1ch, 1dc around on 12st, join with a slst
23. as for 25.
You may need to shape your pear with your hands when you have finished to make it sit just right.
American Instructions

4mm or size 8 hook. 8 ply or worsted weight yarn
You need 4 colours: Brown for stalk and base, light green for body, lighter green or lemon for colour splotch. Leaf green
Large Pear
Starting with brown
1. 2ch, 6sc into 2nd ch from hook, slst into first ch.
Change to green
2. 1ch, 2sc each stitch around slst first ch = 12
3. 1ch, (1sc next st, 2sc next st) around, slst first ch = 18
4. 1ch, (1sc next 2st, 2sc next st) around, slst first ch = 24
5. 1ch, (1sc next 3st, 2sc next st) around, slst first ch = 30
6. 1ch, (1sc next 4st, 2sc next st) around, slst first ch = 36
7. 1ch, (1sc next 5st, 2sc next st) around, slst first ch = 42
8 – 11. 1sc around on 42st, start each round with 1ch, and join with a slst
Make a colour splotch
12 – 14. 1ch, 1sc next 6, using a lighter green, 1sc next 5, working over main colour, then pick up main colour and continue round. Leave the second colour behind work. When doing the second round, gently bring lighter colour across back of work be careful not to pucker your pear.
15. 1ch, (1dc next 5st, 2sc together) around, slst first ch = 36
16. 1ch, 1sc around on 36st, join with a slst
17. 1ch, (1sc next 4st, 2sc together) around, slst first ch = 30
18. 1ch, 1sc around on 30st, join with a slst
19. 1ch, (1sc next 3st, 2sc together) around, slst first ch = 24
20. 1ch, 1sc around on 24st, join with a slst
21. 1ch, (1sc next 2st, 2sc together) around, slst first ch = 18 stuff pear
22. 1ch, 1sc around on 18st, join with a slst
23. 1ch, 1sc around on 18st, join with a slst
24. 1ch, (1sc next st, 2sc together) around, slst first ch = 12
25. 1ch, 2together around, slst and cut yarn. Add extra stuffing if needed
Make a stalk
26. Using brown, join to top of pear and work 6sc around. At this point it may be easier to work from the inside of your work in continuous rounds until the stalk measures 1 inch in length. Finish with a slip stitch and cut yarn. Insert your hook through the side of the pear, and up the middle of the stalk and pull the brown thread end through. This gives a neat finish.
Make a leaf
Using leafy colour make 10ch.
Starting in 2nd ch from hook, work back 1sc next 2ch, 1hdc next 3ch, 1dc next 2ch, 1hdc next ch, 1sc last ch.
Work 2sc into stalk about half way up. This will attach the leaf. Continue to work back along under side loops of ch: 1sc next 2ch, 1hdc next ch, 2dc into next ch, 1hdc next ch, 1sc next 3ch, 1slst and finish off. Weave thread end back through the leaf.
Smaller Pear
Work up to and including row 6.
7 -10 1ch, then 1sc around on 36 stitches.
11 – 13. Make a colour splotch as for larger pear, rows 12 -14. Once you master this you can add an extra few stitches in the next row.
14 – 19. as for rows 17 – 22 (omit row 23)
20. as for 24
21 – 22. 1ch, 1sc around on 12st, join with a slst
23. as for 25.
You may need to shape your pear with your hands when you have finished to make it sit just right.
I am thinking I might work on the whole fruit bowl, but this is a start. Have fun with these, and let me know if you find any gliches in the pattern.
© 2006 crochetroo Do not reproduce pattern by any means. You may use it for personal use, gifts and charity fundraising. Do not sell to make a personal profit.